
Connecting to ZNC
Historical reference: connecting to ZNC.
A reference from an earlier chapter
This material preserves the original Textual documentation and may describe older versions, former services, or superseded policies. It is not a statement of current availability or new Blendbyte commitments.
For current guidance: ZNC, sleep, and staying connected.
On this page
This guide will instruct you how to configure Textual to connect to an installation of ZNC
Prerequisite
This guide assumes that you, the reader, already have a copy of ZNC installed and configured.
Gathering Information
The first step of connecting to ZNC is to gather the information needed to do so.
To connect, Textual will need the following information:
Server Address
The domain name or IP address on which ZNC is reachable
Server Port
The network port on which ZNC is listening for a connection
SSL Value
Whether or not ZNC is configured to use SSL/TLS
Username
The username configured when setting up ZNC
Password
The password configured when setting up ZNC
Network Name
The name of the network being connected to. This is the value entered into the Network Name input field when creating a new network with ZNC's web interface.
Connecting to Bouncer
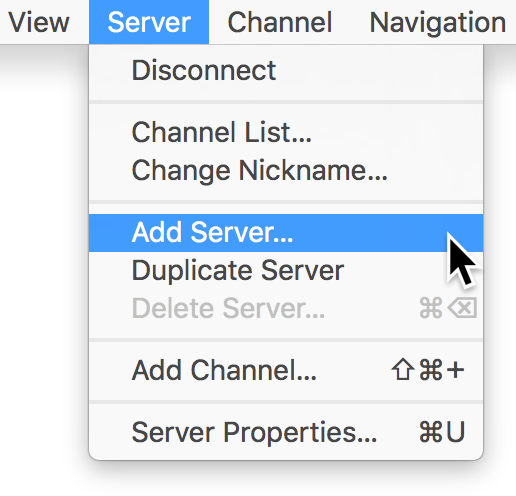
To get started, create a new connection in Textual: Navigate to the main menu in the top left corner of the screen, open the Server menu, then click the item labeled Add Server… when the menu appears.
A window will appear that is visually similar to the following:
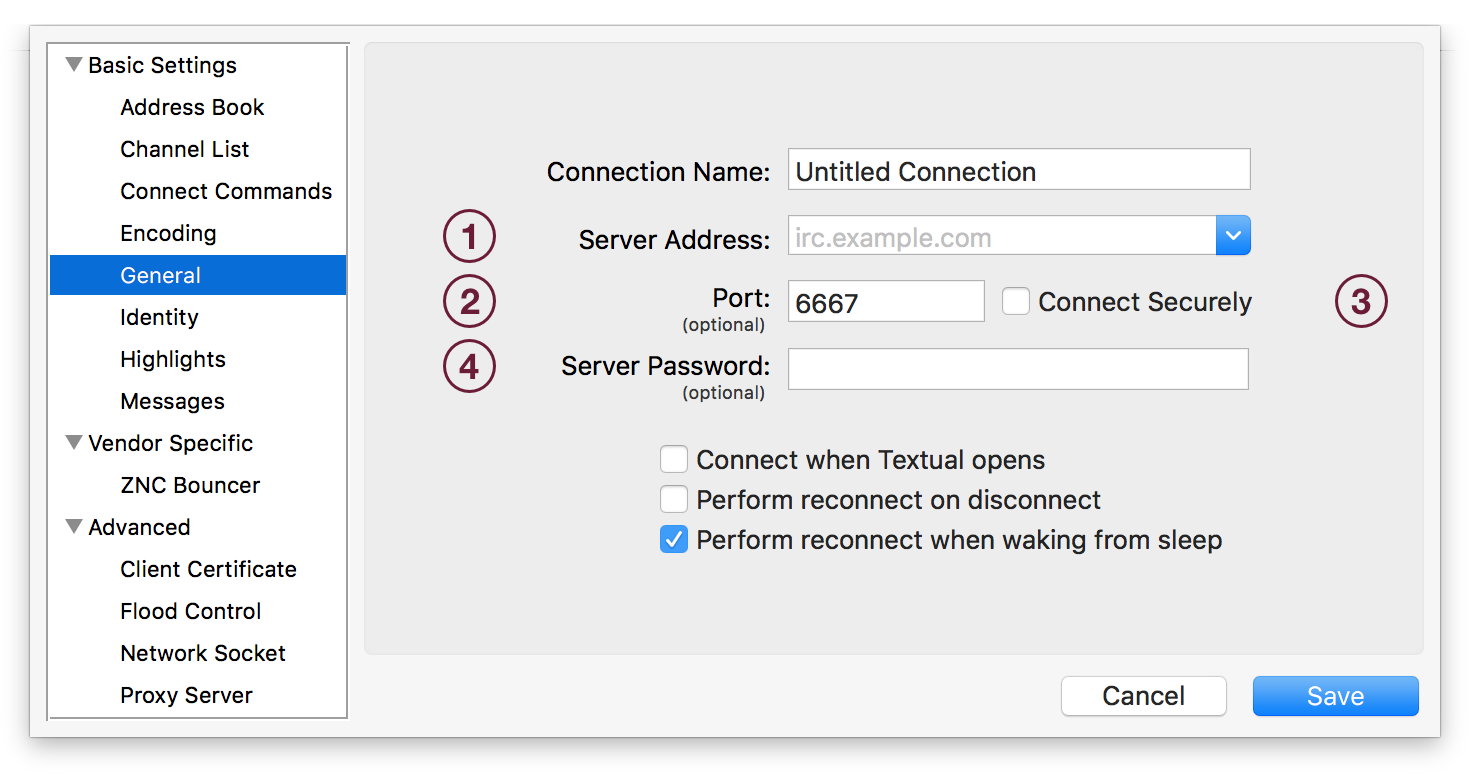
Each number in the image above indicate where you will place the information that has been collected.
Field #1: Enter the domain name or IP address on which ZNC is reachable Field #2: Enter the network port on which ZNC is listening for a connection Field #3: Enable the Connect Securely checkbox if the ZNC is configured to use SSL/TLS Field #4: Enter your password for ZNC
With the Add Server… window still open, click the Identity tab on the left side navigation list.
A window will appear that is visually similar to the following:
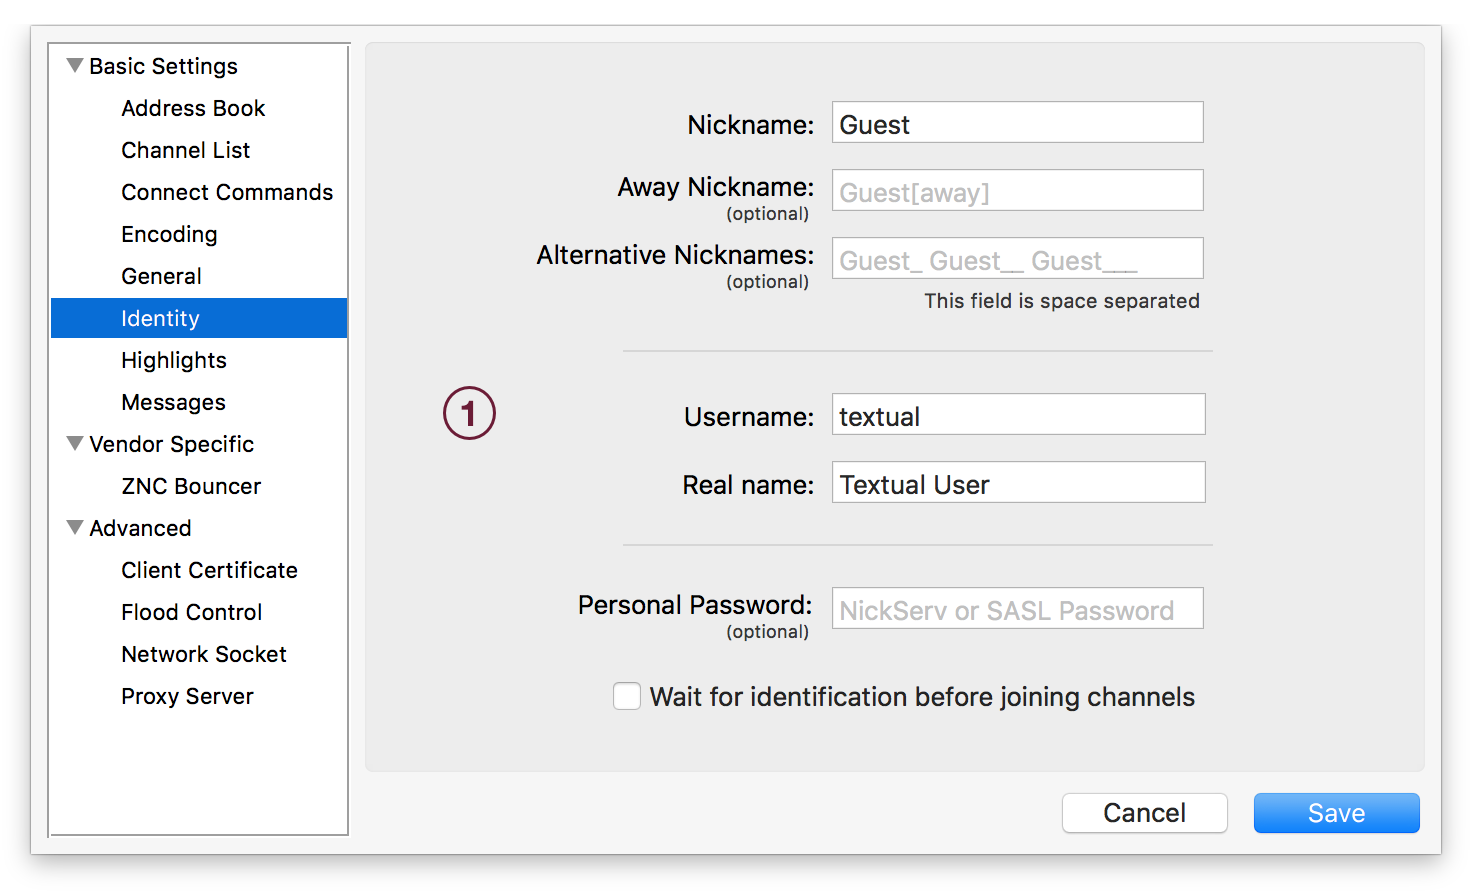
In the field labeled Username is where you will enter your username.
The format of this value is very specific: <username>/<network> — The first half of the value is your ZNC username. The second half, which is prefixed with a forward slash, is the Network Name.
For example, set the value of this field to John/freenode to connect as John to the network named freenode.
Closing
Before you can save, Textual will ask you to configure your Nickname and Real name. Enter any value for these fields. ZNC will ignore what you enter and read its own configuration.
Keep reading
Source material
Original Codeux material preserved from the knowledgebase snapshot of 9 September 2026. Formatting and internal links have been adapted for this site.
Need a hand? Contact us about this guide.