
Automatic Identification using a Certificate
Historical reference: automatic Identification using a Certificate.
A reference from an earlier chapter
This material preserves the original Textual documentation and may describe older versions, former services, or superseded policies. It is not a statement of current availability or new Blendbyte commitments.
For current guidance: TLS and certificate authentication.
On this page
Textual supports sending a client-side certificate during Transport Layer Security (TLS) negotiation. This feature allows for automatic, secure identification with NickServ (or other services) without the need for a password.
Skip to section:
Creating Certificate
If you already have a certificate of your own installed, then you can skip this section.
To get started, open Launchpad from the Dock and navigate to the folder named Other. Within this folder, launch the application named Keychain Access. This application has a set of keys on a key ring as its icon.
Once launched, a window will appear that is visually similar to the following:
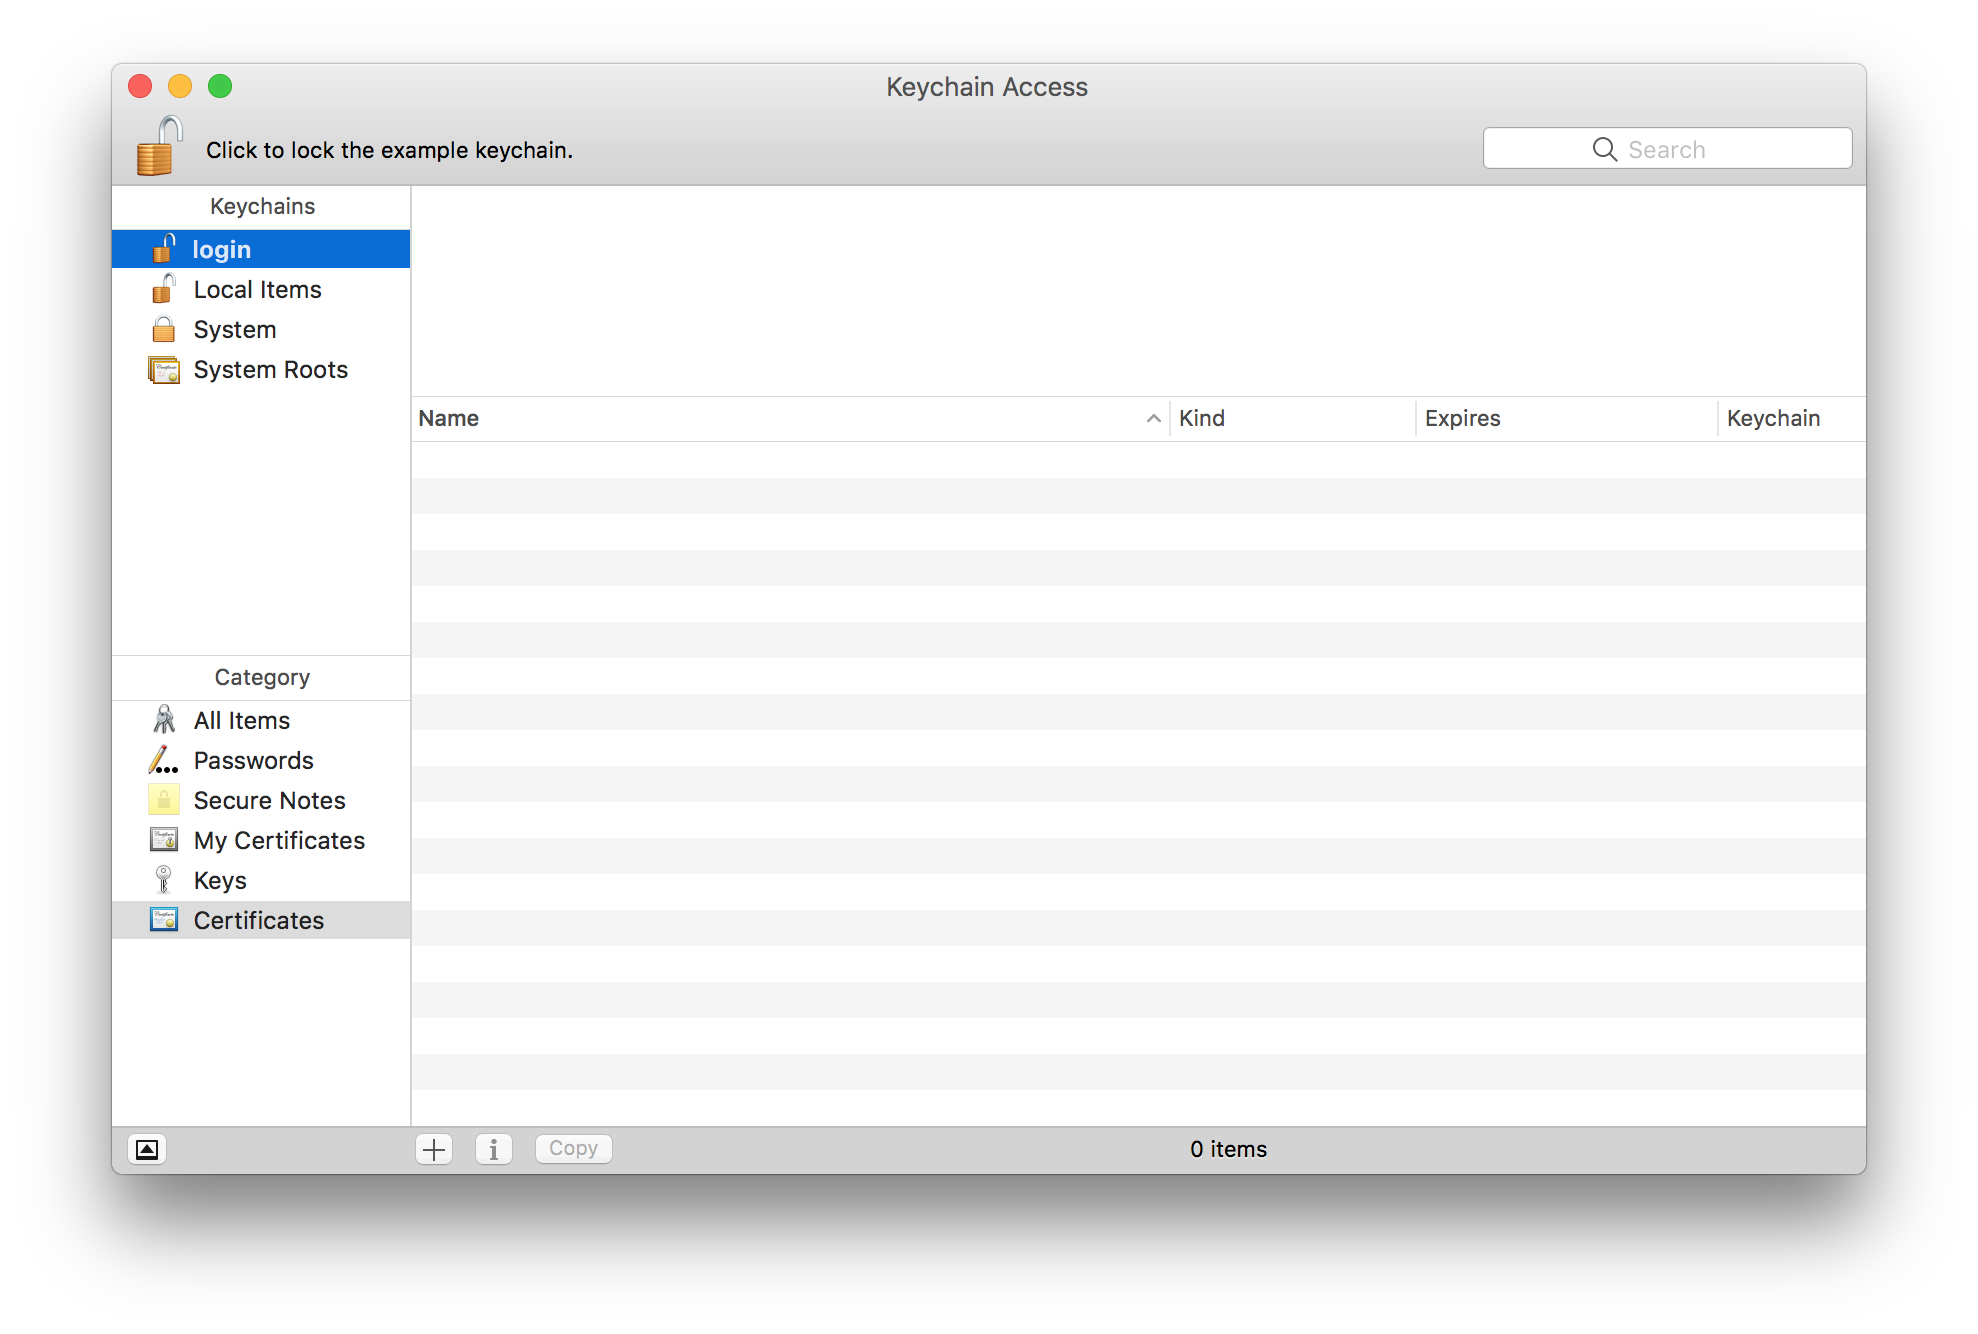
Inside this window, in the top left corner, in the list labeled Keychains; select the keychain named login.
To create a certificate in this keychain, follow these steps:
- In the main menu, in the top left corner of the screen, open the bold Keychain Access menu. Within this menu, open the Certificate Assistant submenu, then click the menu item labeled Create a Certificate….
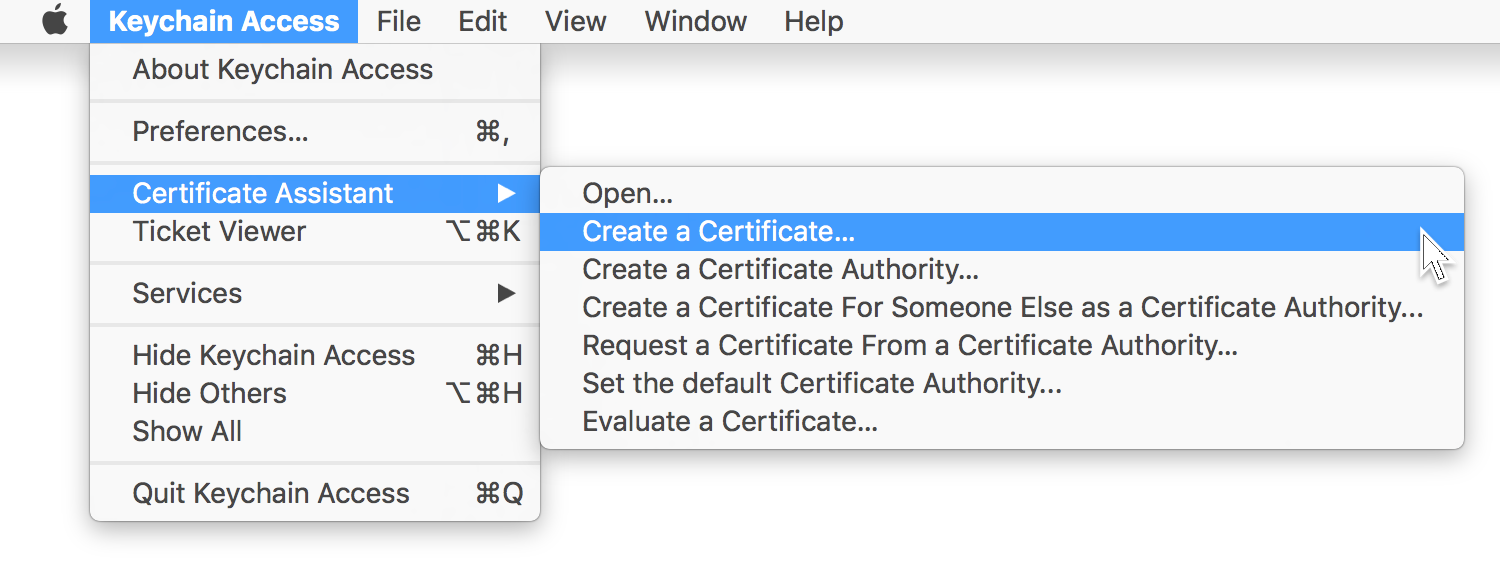
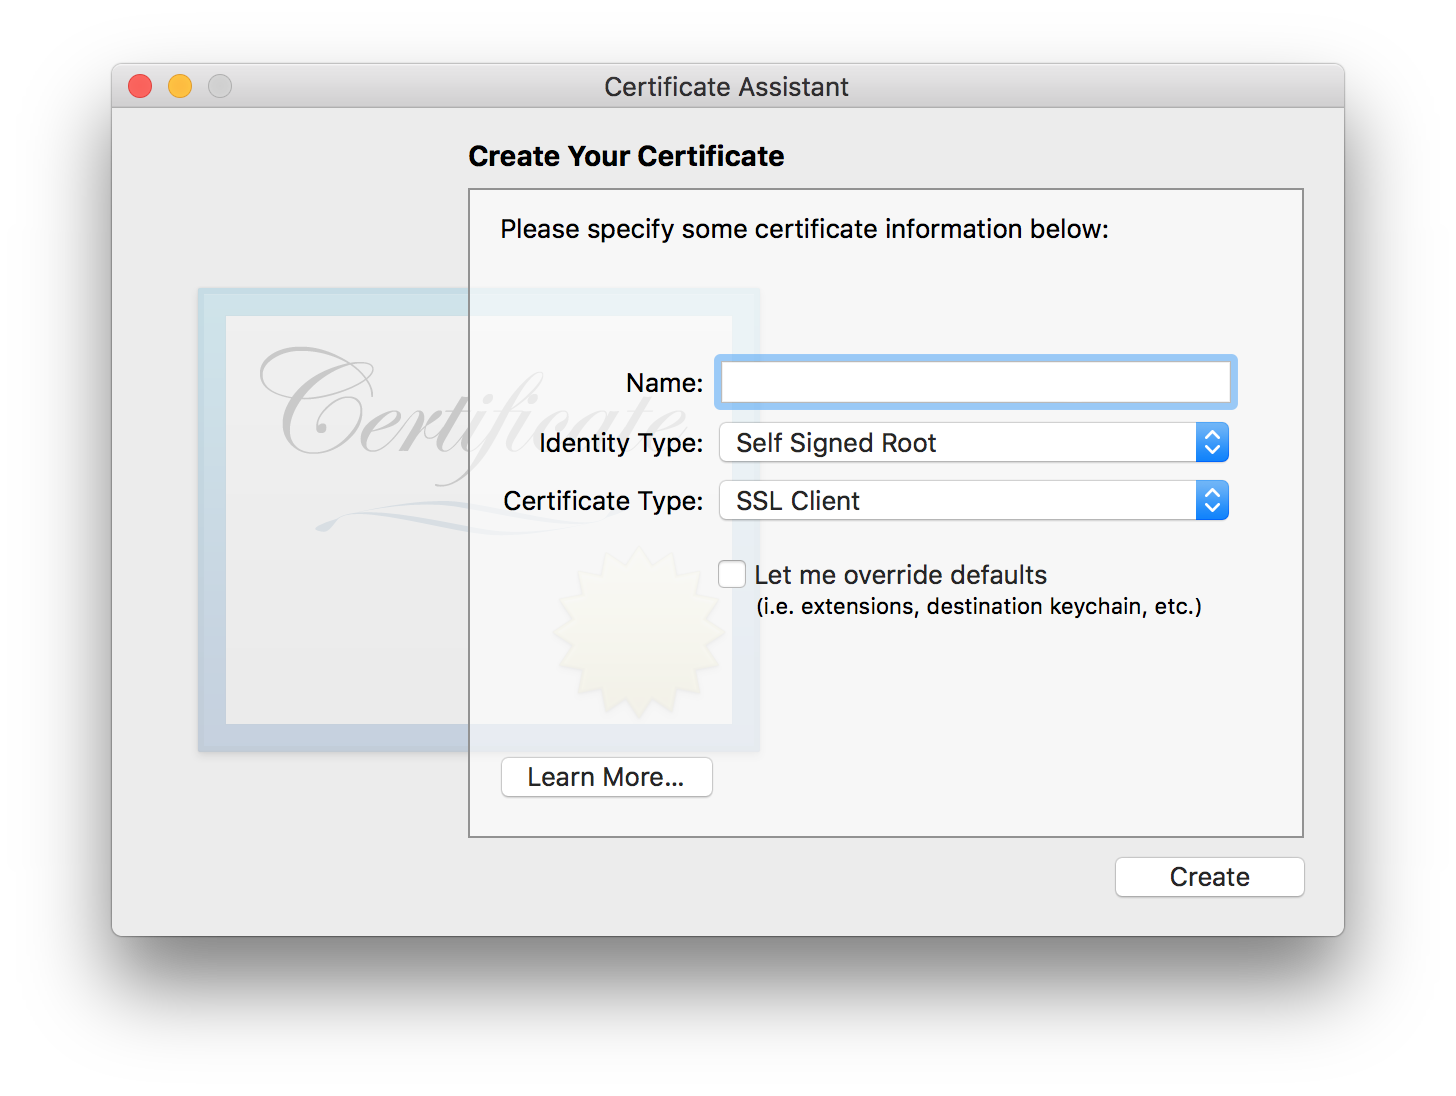
Once clicked, the following window will appear:
-
Inside this window, enter a name into the field labeled Name. The name you chose is not important. It is only used to make your certificate easier to find.
-
Leave the Identity Type as Self Signed Root
-
Change the Certificate Type to SSL Client.
-
Click Create
-
Ignore the You are about to create a self-signed certificate warning by clicking Continue.
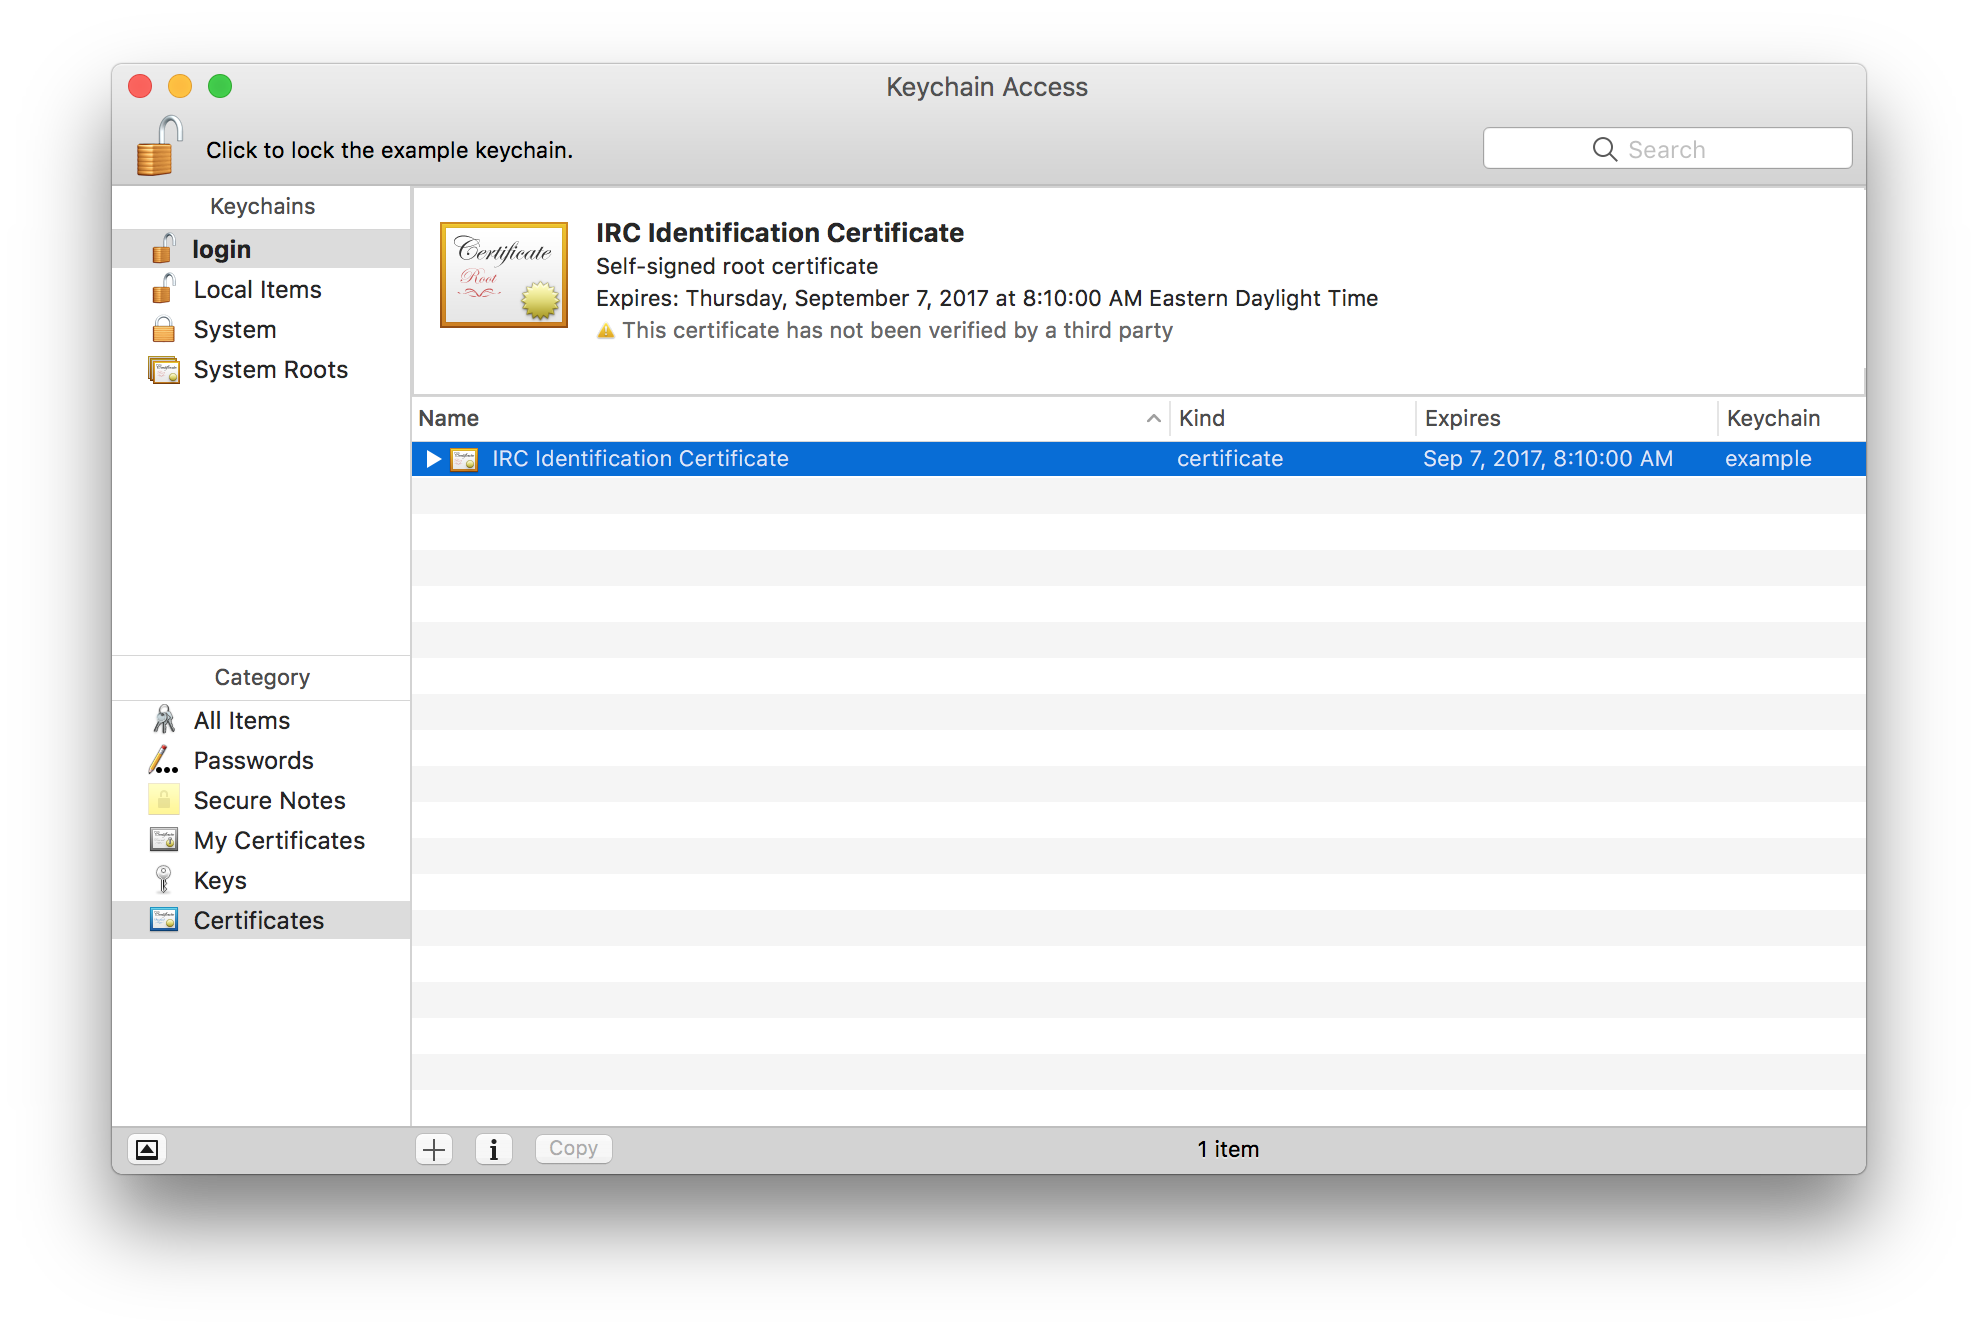
After a few seconds your certificate will be ready for immediate use:
Adding Certificate to Textual
To add a certificate to Textual, follow these steps:
-
Begin by opening Server Properties using the keyboard combination Command U.
-
In the window that appears, click Client Certificate under the Advanced section of the navigation list.
Once clicked, the following window will appear:
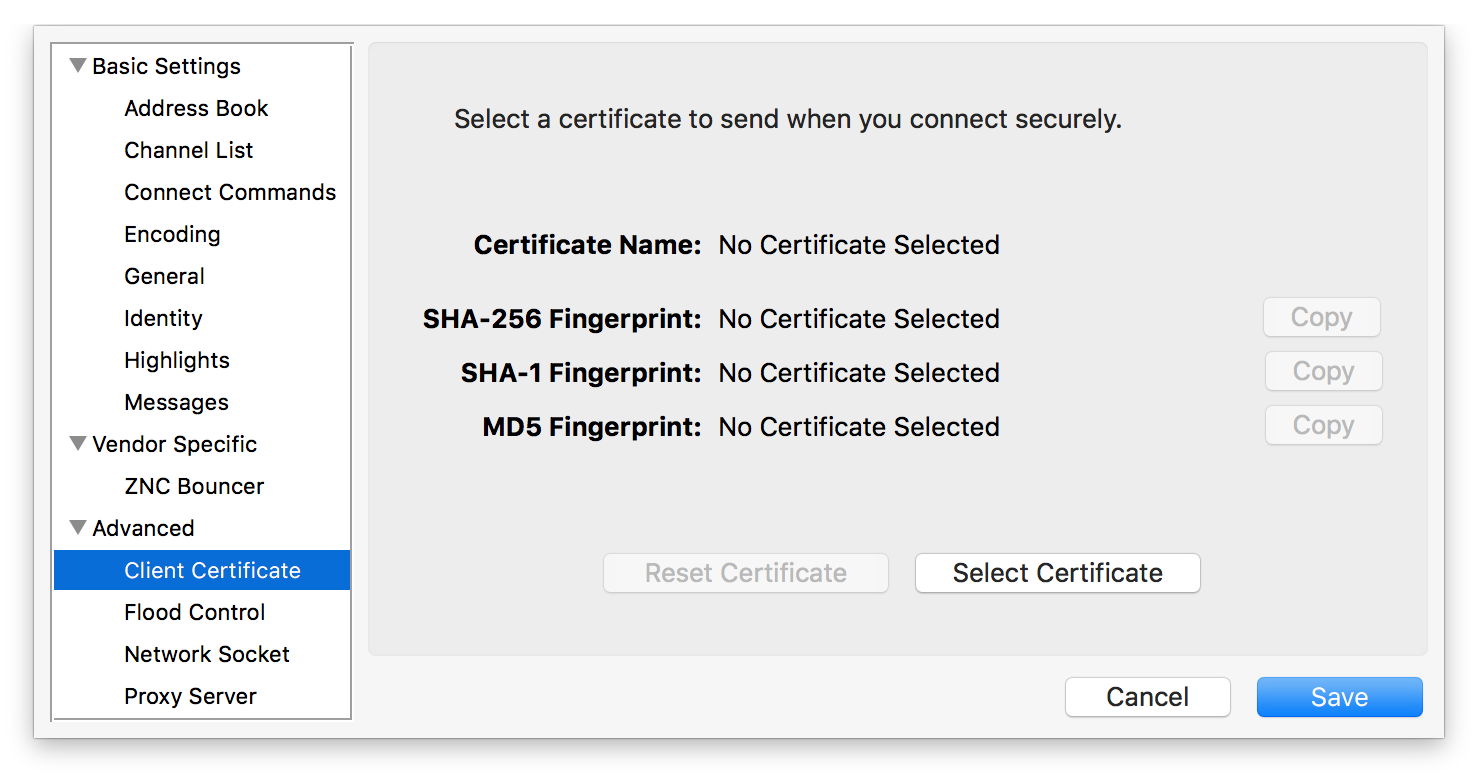
- Inside this window, click the Select Certificate button.
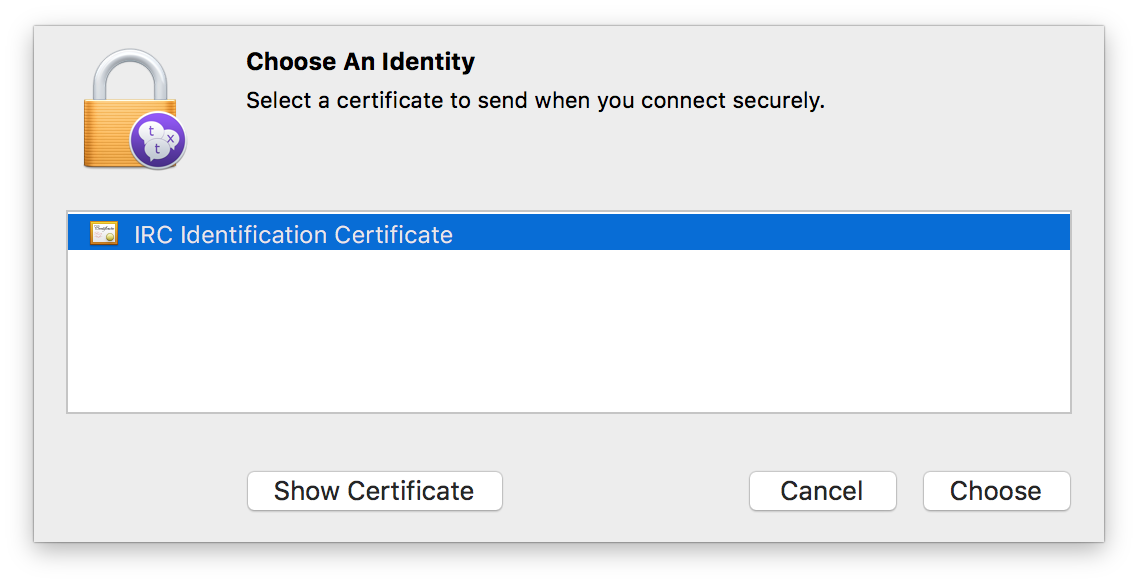
A list of certificates will appear:
-
Select the certificate that you created.
-
Click the Chose button to continue.
Server Properties will update the window to confirm your selection:
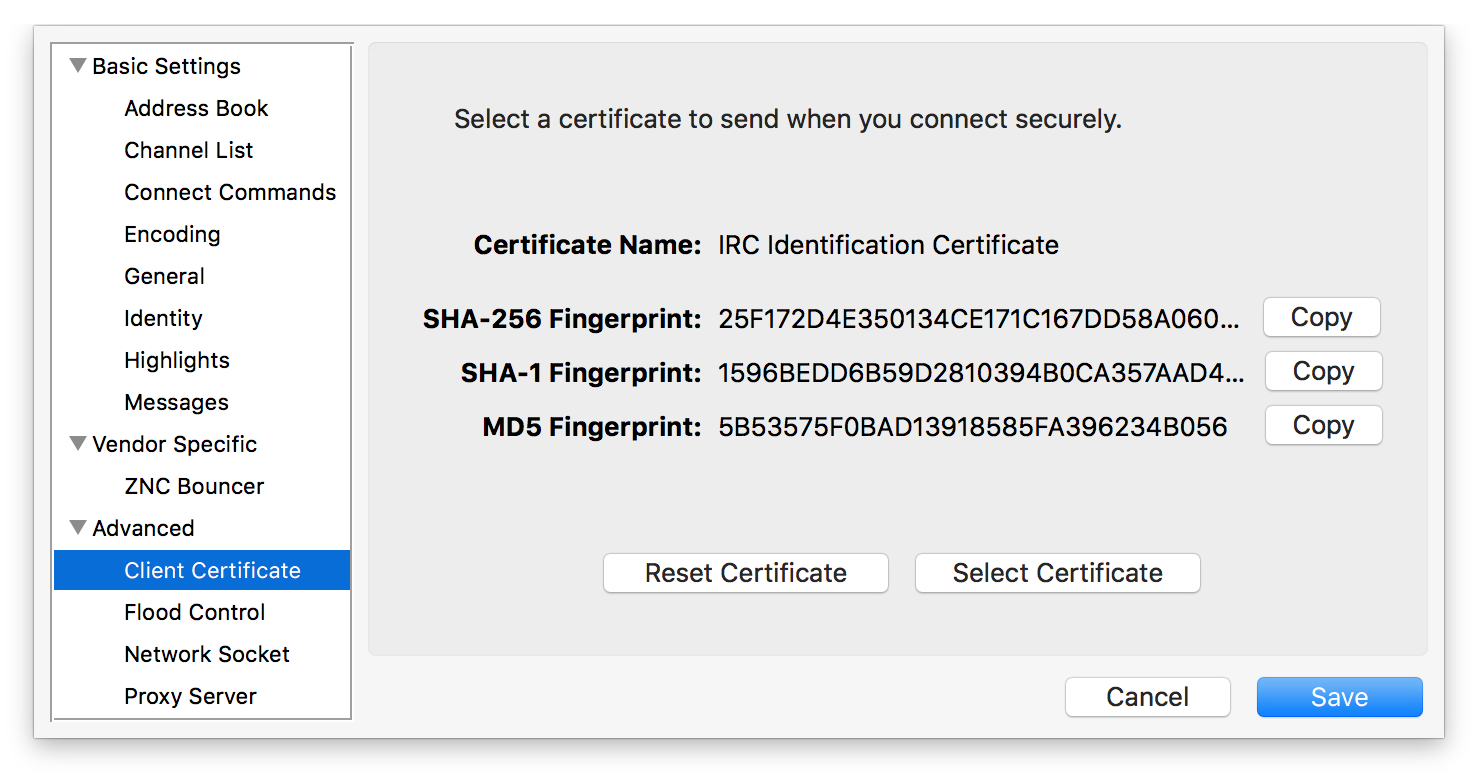
- Finish by clicking the Save button.
Registering Certificate with NickServ
To identify with NickServ using a certificate, the fingerprint of the certificate must be registered.
Which fingerprint you are supposed to register will vary depending on how old the software an IRC network uses is.
Try registering each fingerprint in the following order:
-
SHA-256
-
SHA-1
-
MD5
Registration is made easy thanks to the Copy button next to each fingerprint. When clicked, this button will copy the command needed to register the fingerprint. Paste the result into Textual's main text field and submit.
Using Certificate with SASL
When a client-side certificate is configured, Textual will automatically attempt to use EXTERNAL as the authentication mechanism for SASL. There is nothing that has to be configured to enable this behavior.
For certain use cases, this behavior may not be desirable. This behavior can be disabled using the defaults command.
It is recommended that you do not disable this behavior unless you have a very good reason.
Keep reading
Source material
Original Codeux material preserved from the knowledgebase snapshot of 9 September 2026. Formatting and internal links have been adapted for this site.
Need a hand? Contact us about this guide.